
Building a squad in Wuthering Waves sounds simple enough until you actually try to clear endgame content. Let's be real: there is no single "god-tier" team that steamrolls everything. A lineup that melts a single boss in the Tower of Adversity might completely choke on a multi-wave mob floor. It all comes down to who you've pulled, what you're fighting, and whether you can actually execute the rotations. We are breaking down the core mechanics, the absolute best meta archetypes right now, budget-friendly swaps, and the traps most players fall into.
If you're still finding your footing, the Wuthering Waves beginner guide is worth a read first to get those basic systems down. Once you've got the fundamentals sorted, putting a real team together gets a lot easier.
What makes a strong Wuthering Waves team

You can't just throw three high-tier characters together and expect them to work. A truly great team relies on how well your Resonators play off each other — your damage, utility, and healing have to sync up perfectly.
The core qualities of any competitive lineup:
- Clear roles - A main DPS, a sub-DPS, and a support or healer actually doing their jobs.
- Synergy that clicks - Intro/Outro skills, Concerto energy, and buffs that chain together without awkward pauses.
- Smooth energy flow - Rotations that keep your Resonance Liberations charged and ready, not sitting idle.
- Versatility - Being able to shred a single boss but still clear out waves of trash mobs when needed.
- Sustain you can trust - Heals or shields that keep you alive when enemies start hitting incredibly hard.
A team that shreds the Tower of Adversity can feel incredibly clunky when you're just running around the open world. Some builds rely on hyper-specific burst windows-amazing for deleting bosses, but a massive headache against scattered mobs. Other setups trade away peak damage for consistent, wide-reaching attacks, which is what you actually want for multi-wave fights.
What actually shapes your team's ceiling:
- Which Resonators you have unlocked (and their Sequence Nodes).
- Your Echo sets and how lucky you got with substats.
- Your weapons and their passive buffs.
- Your own mechanical skill and rotation timing.
A top-tier team is all about synergy, not just stacking raw stats. Focus on how your Resonators' kits actually talk to each other to get the best results.
When building your Wuthering Waves best team, always prioritize synergy and smooth rotations over just raw power numbers. The best team on paper won't perform well if the skills and buffs don't chain properly.
Three team slots, roles and flexible functions
You only get three slots in a squad, and how you fill them defines your entire playstyle. The classic setup looks simple on paper, but the actual execution has a ton of moving parts.
The standard roles:
- Main DPS - The star of the show. They hog the field time and eat up most of your team's resources to deal raw damage.
- Sub-DPS - Deals off-field damage or quick burst, while feeding the main DPS with buffs, debuffs, or extra energy.
- Support/Healer - Keeps everyone alive with heals or shields, while boosting stats and grouping up enemies.
Well, the fun part is how easily some Resonators blur these lines. Chisa, for instance, plays like a sub-DPS but brings massive defense-shredding debuffs. Morny keeps you healthy while handing out some of the biggest damage buffs in the entire game.
| Role | Example Resonators | Flexible Functions |
|---|---|---|
| Main DPS | Xuanling, Aemeath, Hiyuki, Calcharo, Sigrika, Augusta, Galbrena | Can flex to a sub-DPS role in specific setups |
| Sub-DPS | Rebecca, Lynae, Chisa, Ciaccona, Roccia, Phoebe, Qiuyuan | Packs off-field damage, buffs, or heavy debuffs |
| Support | Shorekeeper, Verina, Morny, Suisui, Cantarella, Lucilla | Brings serious utility, grouping, or extra damage |
| Healer | Baizhi, Verina, Shorekeeper, Morny | Usually doubles as a buffer or shield generator |
Some hypercarry setups completely ditch a dedicated healer, running two offensive supports instead and relying purely on shields or passive sustain. It works, but only if your main DPS can delete enemies fast enough that you don't need to worry about healing.
Here's what works: if you're working with a limited roster, focus on filling all three roles first, even if you have to use off-meta characters. A team with a decent main DPS backed by solid buffs and healing will easily outperform a greedy triple-DPS squad with zero support.
Concerto Energy, Intro Skills and Outro Skills

Concerto Energy is the fuel that keeps your team's rotation moving. You build it by attacking, using skills, and swapping characters. Knowing how to farm and spend it quickly is what separates casual players from the endgame pros.
Intro Skills pop off the second a Resonator hits the field. They bring instant value-like quick burst damage, buffs, debuffs, or energy. Most high-level rotations are built entirely around landing a specific Intro to trigger a massive damage window.
Outro Skills trigger when a Resonator swaps out, and this is where the real magic happens. A perfectly timed Outro passes massive buffs directly to your incoming main DPS, turning a decent attack into a screen-clearing nuke.
Why this mechanic matters so much:
- It's the key to smooth rotations that make the most of every buff window.
- Your entire buff and debuff chain depends on swapping in the right order.
- Smart swap timing keeps your energy generation incredibly fast.
Here are three great examples of how wild these interactions can get:
- Rebecca's Outro gives the next character a massive boost to Heavy Attack DMG and All DMG. Swapping her out right before your main DPS takes the field is the core engine of her best teams.
- Shorekeeper's kit pumps energy back into the whole squad while generating shields, keeping your rotation from falling apart when fights get chaotic.
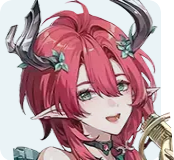

Before you lock in a swap order, check your Resonators' Outro skills. The buff your sub-DPS leaves behind is usually what decides whether your main DPS tickles the boss or completely vaporizes them.
Nailing your Outro Skills is how you turn a decent squad into an absolute powerhouse. Always check what buffs your supports leave behind when they swap out.
Field time, rotations and quickswap fundamentals

Field time is just how long a character stays active before you swap them out. Balancing this is what turns theoretical spreadsheet damage into actual, practical DPS.
The standard rotation flow:
- Support swaps in, drops heals/buffs, and triggers their Outro.
- Sub-DPS takes over, applies debuffs or quick burst, and triggers their Outro.
- Main DPS takes the stage, unloads their entire kit, and hogs the field.
- Repeat the cycle, throwing in Echo Skills and Concerto as cooldowns reset.
Hypercarry vs. Quickswap:
- Hypercarry - Your main DPS stays on the field for almost the entire fight. Supports only pop in for a second to refresh buffs, trigger Outros, and get out of the way.
- Quickswap - All three characters are constantly cycling in and out, chaining Intro/Outro skills and keeping off-field damage ticking non-stop.
Quickswapping takes some serious mechanical skill. If you execute it perfectly, the damage is wild, but a single mistimed swap can ruin your buff windows and kill your momentum. If you're just starting out, hypercarry rotations are way easier to learn and still hit incredibly hard.
Key rotation tips:
- Time your swaps so your buffs don't run out before your main DPS even gets to attack.
- Don't let your supports linger on the field longer than their animations actually require.
- Save your Echo Skills and Resonance Liberations for when all your buffs overlap.
- Get comfortable with your rotation in the open world before trying to run it in the Tower of Adversity.
Current team archetypes and example cores

The current meta is built around five distinct team setups. Each has its own rhythm, strengths, and ideal game modes.
Hypercarry Example
One main DPS and two units whose entire job is to make them hit like a truck. It's a simple concept, but the damage ceiling is massive.
| Role | Resonator | Substitution Option |
|---|---|---|
| Main DPS |  |
Calcharo, Sigrika |
| Sub-DPS |  |
Lynae, Roccia |
| Support |  |
Shorekeeper, Suisui |
This setup pushes Xuanling's Havoc Bane mechanics to the absolute limit. Chisa raises the maximum stack cap for Havoc Bane so Xuanling can unlock her full buff potential, while Rebecca hands off massive Heavy Attack and All DMG buffs on her Outro. This is your go-to for boss fights and any endgame stage where single-target burst is king.
Dual DPS Example
Two damage dealers share the spotlight, backed up by a single healer/buffer. It's a riskier playstyle, but the burst windows are incredibly satisfying.
| Role | Resonator | Substitution Option |
|---|---|---|
| Main DPS |  |
 |
| Sub-DPS |  |
 |
| Support | Morny |  |
The make — or-break detail here: you must set both Aemeath and Lynae to Tune Rupture Mode. If you don't, your burst damage takes a massive hit. Morny keeps the team healthy while providing some of the best damage amplification in the game. This team absolutely shreds bosses, but it can feel a bit slow in multi-wave fights because of the long skill animations.
Quickswap Example
All three characters constantly cycle in and out, dealing damage and passing buffs on the fly. It requires high APM, but the payoff is huge.
| Role | Resonator | Substitution Option |
|---|---|---|
| DPS/Buff |  |
Galbrena |
| DPS/Buff |  |
 |
| Support | Cantarella | Shorekeeper |
Every single Outro feeds the next character in line: Phrolova buffs Roccia, Roccia buffs Cantarella, and Cantarella loops it back to Phrolova. Plus, off-field attacks trigger every time you use an Echo Skill, keeping your damage output constant even when you're swapping. This is incredibly strong for multi-wave fights where consistent uptime beats out single burst windows.
Mono-Attribute Example
Stacking characters of the same element to maximize resonance bonuses and hyper-focus on a single damage type.
| Role | Resonator | Substitution Option |
|---|---|---|
| Main DPS |  |
Cartethyia |
| Sub-DPS |  |
Ciaccona |
| Support | Aero Rover | Shorekeeper |
Aero buffs stack across the entire team here. Sigrika boosts the whole squad's Aero damage while keeping the pressure on. It's a highly versatile setup for both single targets and AoE, but keep in mind that swapping in an off-element character will break your resonance bonuses.
Echo Skill Chain Example
This setup focuses on maximizing Echo Skill DMG and off-field triggers instead of just relying on raw Resonance Liberation bursts.
| Role | Resonator | Substitution Option |
|---|---|---|
| Main DPS | Galbrena | Phrolova |
| Sub-DPS |  |
Roccia |
| Support | Shorekeeper | Verina |
Qiuyuan's unique Echo Skill DMG Deepen buff is the perfect match for Galbrena's skill-heavy playstyle. The rotation is simple: Shorekeeper drops her buff field, Qiuyuan swaps in to apply the Echo Skill boost, and then Galbrena takes over with full stacks to unleash Demon Hypostasis and her Liberation. It works incredibly well against both bosses and endgame mobs.
Free-to-play and low-investment substitutions
You don't need a wallet full of limited five-stars or signature weapons to clear content. Plenty of budget-friendly teams can easily get the job done as long as you invest in their Echoes.
| Main DPS | Sub-DPS | Support/Healer | Notes |
|---|---|---|---|
 |
Yangyang | Baizhi | Great starter team; Baizhi handles heals and drops an ATK buff |
 |
Yangyang | Baizhi | Completely free-to-play and has a super straightforward rotation |
 |
Sanhua | Baizhi or Verina | Encore deals great early damage; Sanhua brings solid Glacio support |
 |
Yangyang | Baizhi | Easy to put together; Yangyang helps keep Calcharo's energy topped off |
 |
Aalto | Baizhi | Jianxin can flex as a main or sub-DPS; Aalto boosts Aero damage |
These teams work because everyone has a clear job. The rotation is as simple as it gets: support goes first to drop buffs, sub-DPS swaps in to apply extra effects and trigger their Outro, and your main DPS finishes the job. No crazy mechanical execution required.
Practical substitution logic when your roster has gaps:
- Need a healer? Verina or Shorekeeper can slot into basically any team in the game without breaking a sweat.
- Need a sub-DPS? Just grab any Resonator with a solid buffing Outro skill to fill the gap.
- Need a main DPS? Just run your highest-level character with your best Echo set, regardless of where they sit on a tier list.
If you keep an eye on the Wuthering Waves Official Website, you'll see the roster is constantly growing, which means more F2P-friendly options are bound to show up alongside the limited banners.
Upgrading your Echoes and weapons is how you close the gap between budget setups and whale teams. Honestly, a Calcharo with perfect Echo substats will easily out-damage a five-star with terrible gear and a signature weapon every single time.
F2P teams can clear almost all endgame content if you have solid Echoes and clean rotations. Focus on how your characters work together, not just their rarity.
Teams for exploration, bosses and endgame

Different game modes want completely different things. A team built to speedrun the Tower of Adversity is going to feel incredibly slow and awkward when you're just trying to run around the open world.
Exploration
Comfort and mobility are way more important than perfect burst windows here. You're fighting random mobs in quick succession, so you want a team that feels smooth to play.
| Main DPS | Sub-DPS | Support/Healer | Why it works |
|---|---|---|---|
| Rover (any) | Yangyang | Baizhi | Super cheap to build, reliable healing, and great mobility |
| Encore | Sanhua | Verina | Glacio resonance brings solid crowd control and steady damage |
Bosses
Single-target burst is everything. You want defense shred, constant debuff uptime, and enough sustain to survive a long fight.
| Main DPS | Sub-DPS | Support/Healer | Why it works |
|---|---|---|---|
| Xuanling | Rebecca | Chisa | Massive burst, great buffs, and stacking defense shred |
| Aemeath | Lynae | Morny | High-damage Tune Rupture rotation backed by solid healing |
Endgame (Tower of Adversity)
Multi-wave floors require consistent, sustained damage and highly efficient rotations. Don't neglect your defensive tools either-getting wiped means starting the whole floor over.
| Main DPS | Sub-DPS | Support/Healer | Why it works |
|---|---|---|---|
| Sigrika | Qiuyuan | Shorekeeper | Great AoE, Aero resonance buffs, and top-tier healing |
| Galbrena | Qiuyuan | Shorekeeper | Strong Echo Skill chains, big burst windows, and great sustain |
Tailoring your team to the specific enemies you're fighting will always work better than just forcing a "meta" team that isn't built for that specific floor.
Swapping out just one Resonator or Echo set can completely change how a team feels in a new mode. Don't be afraid to mix things up!
Common team-building mistakes

Most team-building issues come down to a few common mistakes. Spotting them early will save you a ton of resources and headaches.
- Running three DPS units with zero support - You'll run out of field time instantly, and nobody will stay alive long enough to deal real damage anyway. Always bring some sustain.
- Ignoring Intro and Outro skills - Building a team without checking what buffs your characters pass on swap-out is just leaving free damage on the table.
- Messing up your Concerto Energy - Slow rotations that miss your Liberation windows will absolutely tank your overall DPS. Practice the swap cycle until it feels like second nature.
- Forgetting about survivability in endgame - You can get away with no healers in the open world, but the Tower of Adversity will punish you for it. Bring shields or heals.
- Breaking resonance bonuses for no reason - Swapping an off-element character into a mono-attribute team kills your resonance buffs, and the replacement unit better have a massive kit to make up for it.
- Choosing rarity over synergy - A well-built four-star sub-DPS that actually fits your rotation will easily outperform a mismatched five-star who does nothing for your main DPS.
- Neglecting your Echoes and weapons - Team comps don't mean much if your gear is terrible. Always prioritize upgrading your Echoes alongside your characters.
- Bringing AoE teams to single-target boss fights - Skills designed to hit wide, scattered mobs usually lose a ton of efficiency when you're trying to burn down a single boss.
If your rotation feels clunky or you're getting deleted too fast, take a look at your swap order before blaming the characters. Most of the time, the issue is structural, not the Resonator itself.
Running three pure damage dealers with zero healing or shields is the fastest way to get wiped in endgame content.
Quick team checklist
Before you lock in a new team, run through this quick checklist:
- Do I have a clear main DPS, sub-DPS, and support or healer?
- Are my Intro and Outro skills set up to buff my main DPS when all my cooldowns line up?
- Is my Concerto Energy building smoothly without awkward pauses in the rotation?
- Does the team have enough healing or shields to survive the content I'm running?
- Are my Echoes and weapons fully upgraded and matched to each character's role?
- Did I actually tailor this lineup for the specific mode I'm playing?
Building a great team takes some trial and error. The more you practice your rotations and mess around with different setups, the easier it gets to spot what works. If you need a refresher on the basics, the Wuthering Waves beginner guide has everything you need to get started.